As a developer / consultant / integrator, you’ve been tasked with building an integration with Cliniko and you have to figure out where to start from. Let’s work through the logical sequence of events. (🤔)
Please note that any API keys displayed here have already been deleted.
API Keys are very sensitive and you should go to great lengths to ensure that they are not visible in screenshots or code snippets pasted in requests to support or public forums
🔗 Helpful Links:
- https://groups.google.com/a/redguava.com.au/g/cliniko-api (official Google Developer Group)
- https://docs.api.cliniko.com/developer-portal/ (API Documentation)
- https://www.postman.com/ (Postman)
Step 01: Obtain API Key
In most cases you want to make sure that the API key you receive works and can do the things that you want it to do. The key things you will need for this step are the following:
- API Key
- Shard (you can identify this from the last characters on your API Key)

The API key is the full key above.
Step 02: Convert the Cliniko API Key to Base 64
This step is required to ensure that plaintext API keys are not sent over the internet. Use a site like

Step 03: Setup a Postman collection for Cliniko
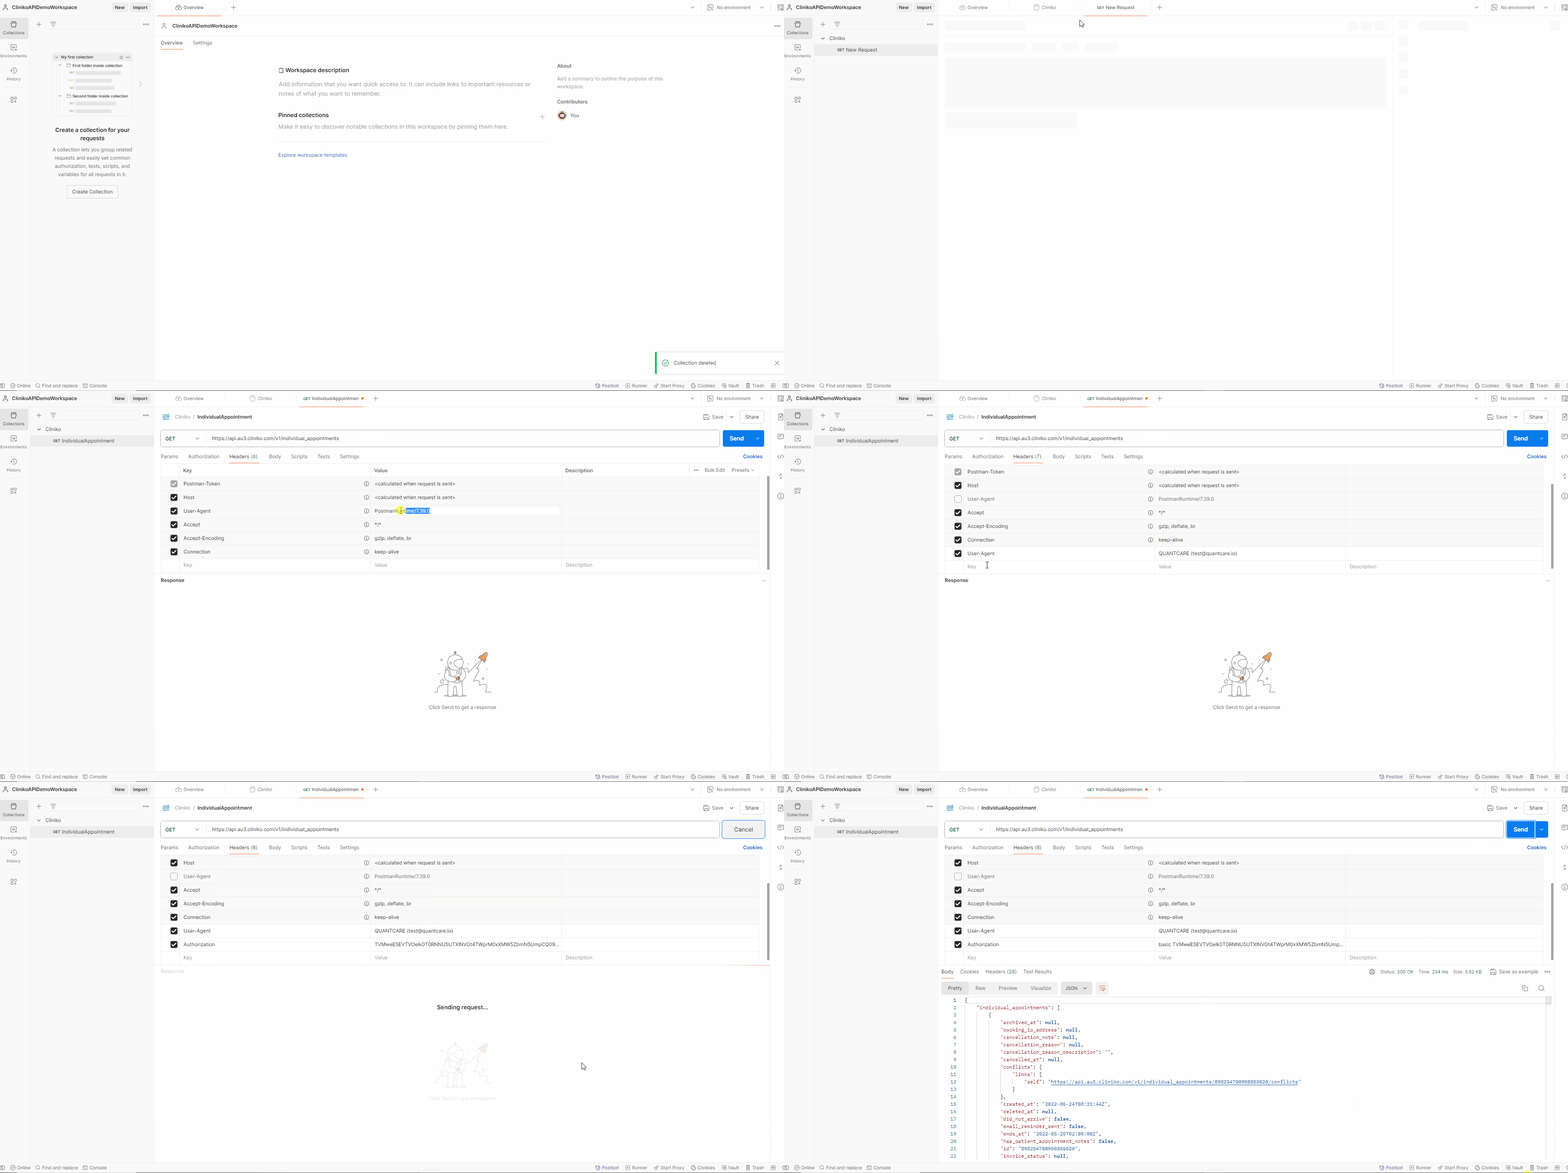
Setup a postman collection and a request type similar to the below GIF


1 – API (can be obtained from the Shard – the only part that changes is the au3 component of the url)
2 – User-Agent is important when calling the API to help Cliniko identify your application. Put your email address and Application name in here
3 – Authorization is a combination of the word “basic” and the base64 string (not the API key)
If you can make these calls and see a payload similar to the below structure then you have everything you need from Cliniko to build your integration.
REMEMBER: Your API key is tied to the user that gave it to you. Anything you see (or in the event you write back to Cliniko) will be in the context of this user.
